1. 얼굴유사도 확인하기
◼ 아나콘다로 가상환경 만들기
|
conda create -n if python=3.10 |
  |
◼ Insightface Git-hub
✔ 링크: https://github.com/deepinsight/insightface
GitHub - deepinsight/insightface: State-of-the-art 2D and 3D Face Analysis Project
State-of-the-art 2D and 3D Face Analysis Project. Contribute to deepinsight/insightface development by creating an account on GitHub.
github.com
✔ 확인할 곳

◼ insightface 설치 (vscode_terminal_cmd)
|
pip install insightface
|
✔오류시 C++ Build Tools 설치 필요 ✔ 링크: https://visualstudio.microsoft.com/ko/visual-cpp-build-tools/    |
◼ 설치된 것을 확인

◼ insightfaceexamples/demo_analysis.py 에서 코드 + 약간의 수정
|
# Step1 라이브러리 불러오기
import argparse
import cv2
import sys
import numpy as np
import insightface
from insightface.app import FaceAnalysis
from insightface.data import get_image as ins_get_image
# Step2 추론기 초기화
app = FaceAnalysis()
app.prepare(ctx_id=0, det_size=(640,640))
# Step3 데이터
img = ins_get_image('t1')
# Step4 추론
faces = app.get(img)
rimg = app.draw_on(img, faces)
cv2.imwrite("./t1_output.jpg", rimg)
# Step5 시각화
feats = []
for face in faces:
feats.append(face.normed_embedding)
feats = np.array(feats, dtype=np.float32)
sims = np.dot(feats, feats.T)
print(sims)
|
 ✔ 오류시에 설치 (GPU 사용안한다면)  |
◼ 오류수정필요 (터미널에 오류 링크 Ctrl 클릭하면서 들어가기)
 |
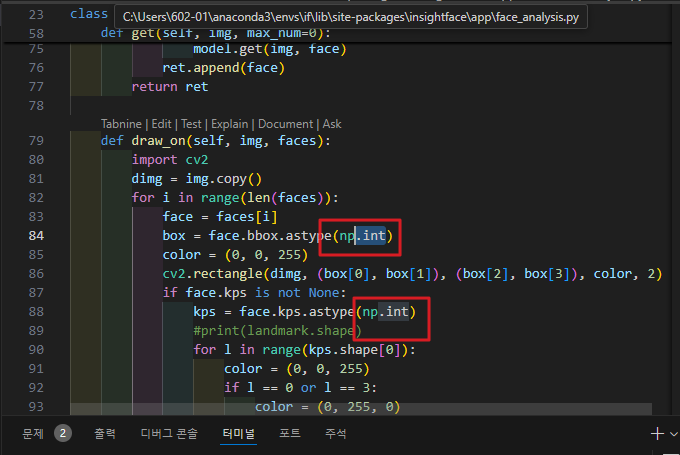 np 삭제 VVVVVV  |
◼ 시각화 결과
 |

|
◼ 두개의 이미지를 비교하기
|
# step 1 라이브러리 불러오기
import argparse
import cv2
import sys
import numpy as np
import insightface
from insightface.app import FaceAnalysis
# step 2 추론기 초기화
app = FaceAnalysis()
app.prepare(ctx_id=0, det_size=(640, 640))
# step 3 데이터 - 두 이미지 읽기
img1_path = "face01.png" # 첫 번째 이미지 경로
img2_path = "face01.png" # 두 번째 이미지 경로
img1 = cv2.imread(img1_path)
img2 = cv2.imread(img2_path)
# step 4 추론 - 두 이미지에서 얼굴 검출 및 특징 추출
faces1 = app.get(img1)
faces2 = app.get(img2)
# step 5 특징 벡터 수집
feats1 = []
for face in faces1:
feats1.append(face.normed_embedding)
feats2 = []
for face in faces2:
feats2.append(face.normed_embedding)
# step 6 유사도 계산
feats1 = np.array(feats1, dtype=np.float32)
feats2 = np.array(feats2, dtype=np.float32)
# 두 이미지 간의 유사도 계산 (코사인 유사도)
sims = np.dot(feats1, feats2.T)
print("Similarity Matrix:")
print(sims)
# 각 얼굴들 간의 유사도 중 가장 높은 유사도를 찾아 해석
max_similarity = np.max(sims)
if max_similarity > 0.8:
print("두 이미지의 얼굴은 매우 닮았습니다! 동일 인물일 가능성이 높습니다.")
elif max_similarity > 0.5:
print("두 이미지의 얼굴은 애매합니다.")
else:
print("두 이미지의 얼굴은 서로 다른 사람입니다.")
|
| [ 다른 사진을 넣었을 때 ] 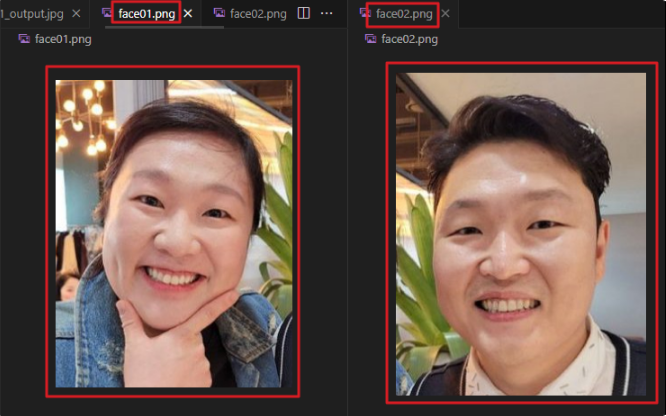  ㄴ 닮은 꼴인 경우라도, 다른 사람이라면 타인이라는 것을 정확히 인식함 -> 성능이 좋다 [ 같은 사진을 넣었을 때 ]  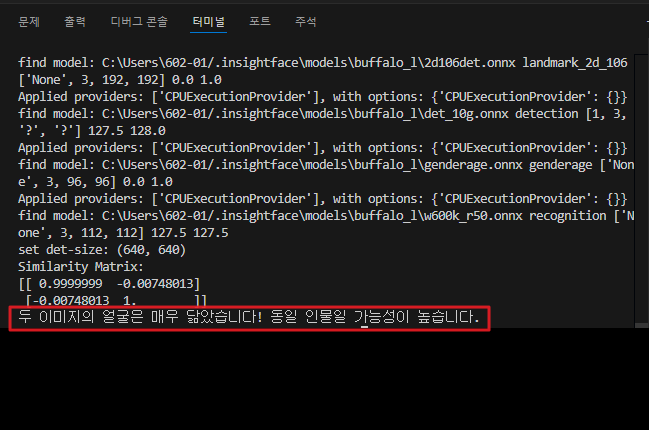 |
2. 얼굴 바꾸기
◼ insightfaceexamples/in_swapper/ inswapper_main.py 에서 코드가져오기
|
import datetime
import numpy as np
import os
import os.path as osp
import glob
import cv2
import insightface
from insightface.app import FaceAnalysis
from insightface.data import get_image as ins_get_image
assert insightface.__version__>='0.7'
if __name__ == '__main__':
app = FaceAnalysis(name='buffalo_l')
app.prepare(ctx_id=0, det_size=(640, 640))
swapper = insightface.model_zoo.get_model('inswapper_128.onnx', download=True, download_zip=True)
img = ins_get_image('t1')
faces = app.get(img)
faces = sorted(faces, key = lambda x : x.bbox[0])
assert len(faces)==6
source_face = faces[2]
res = img.copy()
for face in faces:
res = swapper.get(res, face, source_face, paste_back=True)
cv2.imwrite("./t1_swapped.jpg", res)
res = []
for face in faces:
_img, _ = swapper.get(img, face, source_face, paste_back=False)
res.append(_img)
res = np.concatenate(res, axis=1)
cv2.imwrite("./t1_swapped2.jpg", res)
|
 ✔오류 _ 해당모델을 더이상 불러올 수 없음  model zoo 에서 확인해보니 없음 직접 다운받아야함  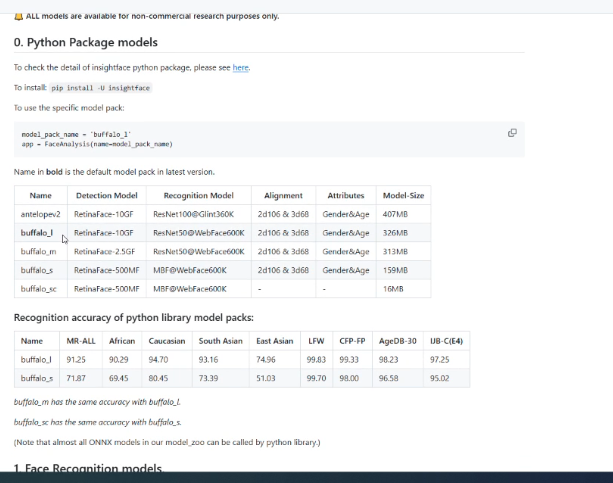 |
◼ 오류 해결 _ 허깅페이스에서 inswapper_128.onnx 직접 다운로드
모델 다운로드 링크: https://huggingface.co/ezioruan/inswapper_128.onnx/blob/main/inswapper_128.onnx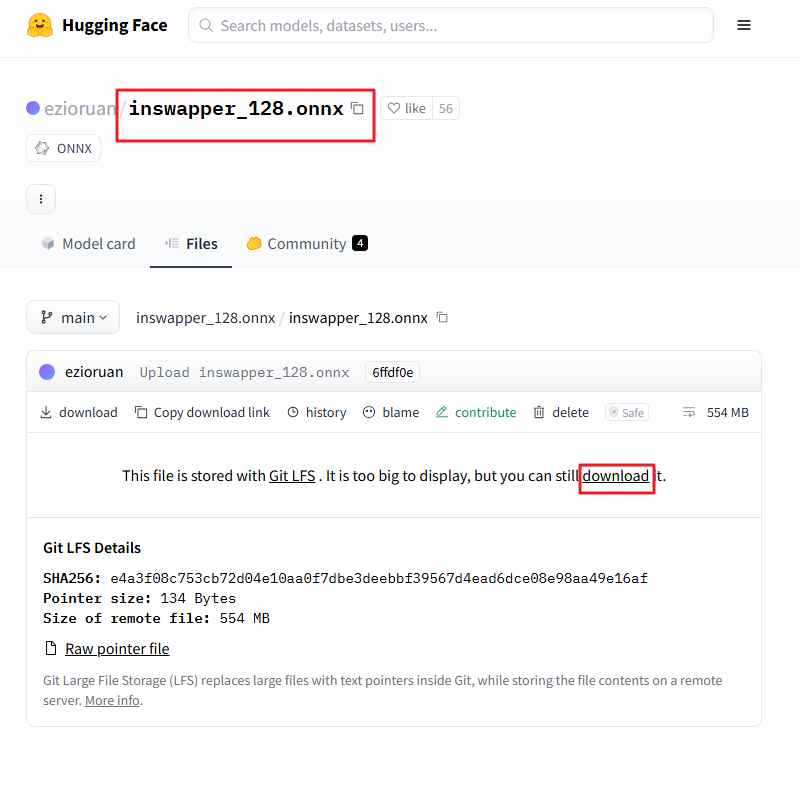 |
◼ 얼굴이 바꾸어 저장
|
import cv2
import numpy as np
import os
import stat
from insightface.app import FaceAnalysis
import insightface
# InsightFace의 버전이 0.7 이상인지 확인 (0.7 이상이어야 필요한 기능을 사용할 수 있음)
assert insightface.__version__ >= '0.7'
def ensure_directory_permissions(directory):
"""
디렉토리가 존재하는지 확인하고, 없으면 생성하며 필요한 쓰기 권한을 추가로 설정합니다.
"""
if not os.path.exists(directory): # 디렉토리가 존재하는지 확인
os.makedirs(directory) # 디렉토리가 없으면 생성
# 디렉토리에 읽기, 쓰기, 실행 권한을 사용자, 그룹, 기타 사용자에게 부여
os.chmod(directory, stat.S_IRWXU | stat.S_IRGRP | stat.S_IXGRP | stat.S_IROTH | stat.S_IXOTH)
def swap_faces(img1_path, img2_path, output_dir):
"""
두 이미지 간의 얼굴을 교체(swap)하고 결과 이미지를 저장합니다.
Args:
img1_path (str): 첫 번째 이미지 파일 경로.
img2_path (str): 두 번째 이미지 파일 경로.
output_dir (str): 결과 이미지를 저장할 디렉토리.
"""
# 얼굴 분석을 위한 모듈을 'buffalo_l' 모델로 초기화
app = FaceAnalysis(name='buffalo_l')
# GPU(ctx_id=0) 및 얼굴 탐지 크기(640x640)로 모델 준비
app.prepare(ctx_id=0, det_size=(640, 640))
# 얼굴 교체를 위한 모델 'inswapper_128.onnx' 로드, 필요한 경우 다운로드
swapper = insightface.model_zoo.get_model('inswapper_128.onnx', download=True, download_zip=True)
# OpenCV를 사용하여 첫 번째 이미지를 읽기
img1 = cv2.imread(img1_path)
# OpenCV를 사용하여 두 번째 이미지를 읽기
img2 = cv2.imread(img2_path)
# 이미지가 제대로 로드되지 않은 경우 예외 발생
if img1 is None or img2 is None:
raise ValueError("이미지 로드 오류. 파일 경로를 확인하세요.")
# 첫 번째 이미지에서 얼굴 탐지 수행
faces1 = app.get(img1)
# 두 번째 이미지에서 얼굴 탐지 수행
faces2 = app.get(img2)
# 두 이미지에서 얼굴이 탐지되지 않은 경우 예외 발생
if len(faces1) == 0 or len(faces2) == 0:
raise ValueError("한 이미지 또는 두 이미지에서 얼굴을 감지하지 못했습니다.")
# 각 이미지에서 탐지된 첫 번째 얼굴을 소스 얼굴로 선택
source_face1 = faces1[0]
source_face2 = faces2[0]
# 얼굴 교체 결과를 저장할 이미지 복사본 생성
swapped_img1 = img1.copy()
swapped_img2 = img2.copy()
# 첫 번째 이미지의 모든 탐지된 얼굴을 반복하며 두 번째 이미지의 소스 얼굴로 교체
for face in faces1:
swapped_img1 = swapper.get(swapped_img1, face, source_face2, paste_back=True)
# 두 번째 이미지의 모든 탐지된 얼굴을 반복하며 첫 번째 이미지의 소스 얼굴로 교체
for face in faces2:
swapped_img2 = swapper.get(swapped_img2, face, source_face1, paste_back=True)
# 출력 디렉토리가 존재하는지 확인하고 필요한 권한 설정
ensure_directory_permissions(output_dir)
# 결과 이미지를 저장할 파일 경로 지정
swapped_img1_path = os.path.join(output_dir, "img1_swapped.jpg")
swapped_img2_path = os.path.join(output_dir, "img2_swapped.jpg")
# 교체된 이미지를 지정된 경로에 저장
cv2.imwrite(swapped_img1_path, swapped_img1)
cv2.imwrite(swapped_img2_path, swapped_img2)
# 결과 이미지가 저장된 경로를 출력
print(f"교체된 이미지를 {swapped_img1_path}와 {swapped_img2_path}에 저장했습니다.")
if __name__ == '__main__':
# swap_faces 함수를 사용하는 예제
# 첫 번째 입력 이미지 경로
img1_path = "face05.jpg"
# 두 번째 입력 이미지 경로
img2_path = "face06.jpg"
# 교체된 이미지를 저장할 디렉토리
output_dir = "./"
# 지정된 입력값으로 얼굴 교체 함수 호출
swap_faces(img1_path, img2_path, output_dir)
|
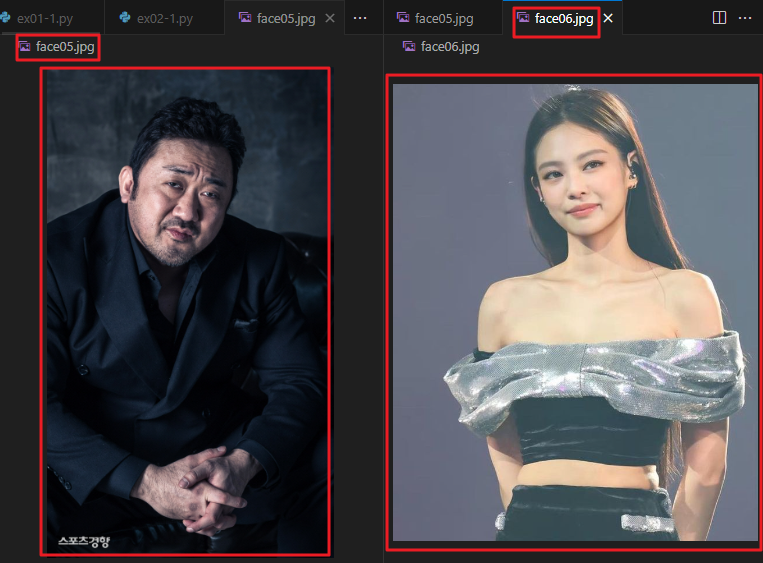 [결과]  |
'AI > 컴퓨터 비전' 카테고리의 다른 글
| 20. Mediapipe 활용(2) | 자세 랜드마크 감지 (0) | 2025.01.03 |
|---|---|
| 19. Mediapipe 활용(1) | 손 랜드마크 감지 (0) | 2025.01.03 |
| 18. YOLO v8을 이용한 차량 파손 검사 (0) | 2024.08.13 |
| 17. YOLO v8을 이용한 이상행동 탐지 (0) | 2024.08.12 |
| 16. YOLO v8를 활용한 안전모 탐지 (0) | 2024.08.08 |


