1. 자세 랜드마크 감지
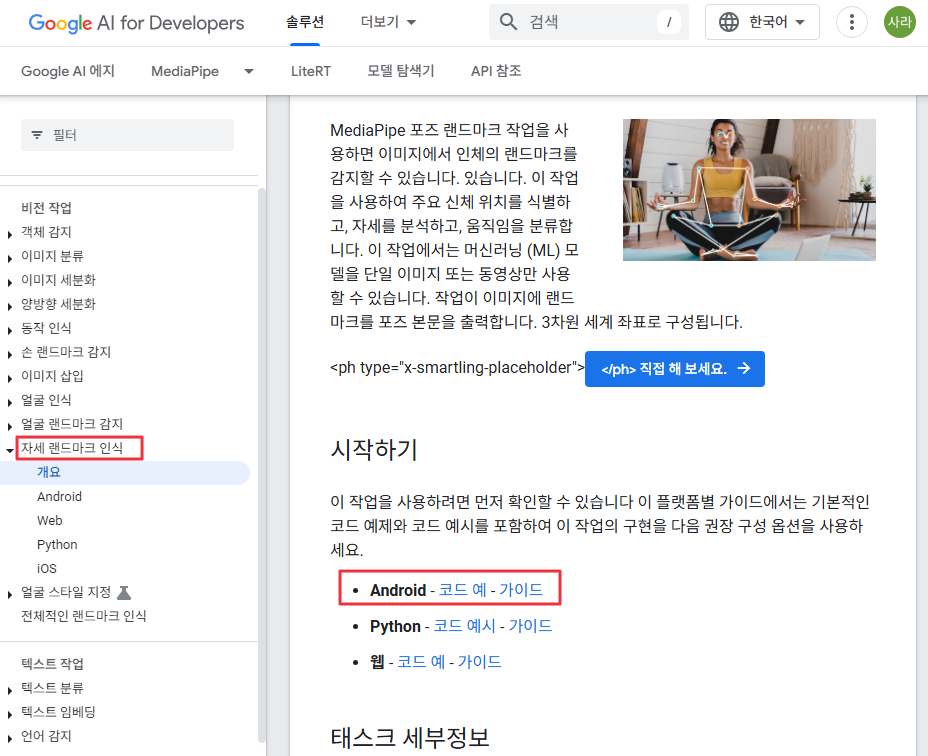
◼ Mediapipe 사이트
✔링크: https://ai.google.dev/edge/mediapipe/solutions/guide?hl=ko
MediaPipe 솔루션 가이드 | Google AI Edge | Google AI for Developers
LiteRT 소개: 온디바이스 AI를 위한 Google의 고성능 런타임(이전 명칭: TensorFlow Lite)입니다. 이 페이지는 Cloud Translation API를 통해 번역되었습니다. 의견 보내기 MediaPipe 솔루션 가이드 의견 보내기 달
ai.google.dev

◼ model bundle 설치 (vscode_terminal_cmd 입력)
◼ 시각화 하기
|
#@markdown To better demonstrate the Pose Landmarker API, we have created a set of visualization tools that will be used in this colab. These will draw the landmarks on a detect person, as well as the expected connections between those markers.
from mediapipe import solutions
from mediapipe.framework.formats import landmark_pb2
import numpy as np
def draw_landmarks_on_image(rgb_image, detection_result):
pose_landmarks_list = detection_result.pose_landmarks
annotated_image = np.copy(rgb_image)
# Loop through the detected poses to visualize.
for idx in range(len(pose_landmarks_list)):
pose_landmarks = pose_landmarks_list[idx]
# Draw the pose landmarks.
pose_landmarks_proto = landmark_pb2.NormalizedLandmarkList()
pose_landmarks_proto.landmark.extend([
landmark_pb2.NormalizedLandmark(x=landmark.x, y=landmark.y, z=landmark.z) for landmark in pose_landmarks
])
solutions.drawing_utils.draw_landmarks(
annotated_image,
pose_landmarks_proto,
solutions.pose.POSE_CONNECTIONS,
solutions.drawing_styles.get_default_pose_landmarks_style())
return annotated_image
|
◼ 이미지 다운로드 (주소창 입력)
|
https://cdn.pixabay.com/photo/2019/03/12/20/39/girl-4051811_960_720.jpg |
 |
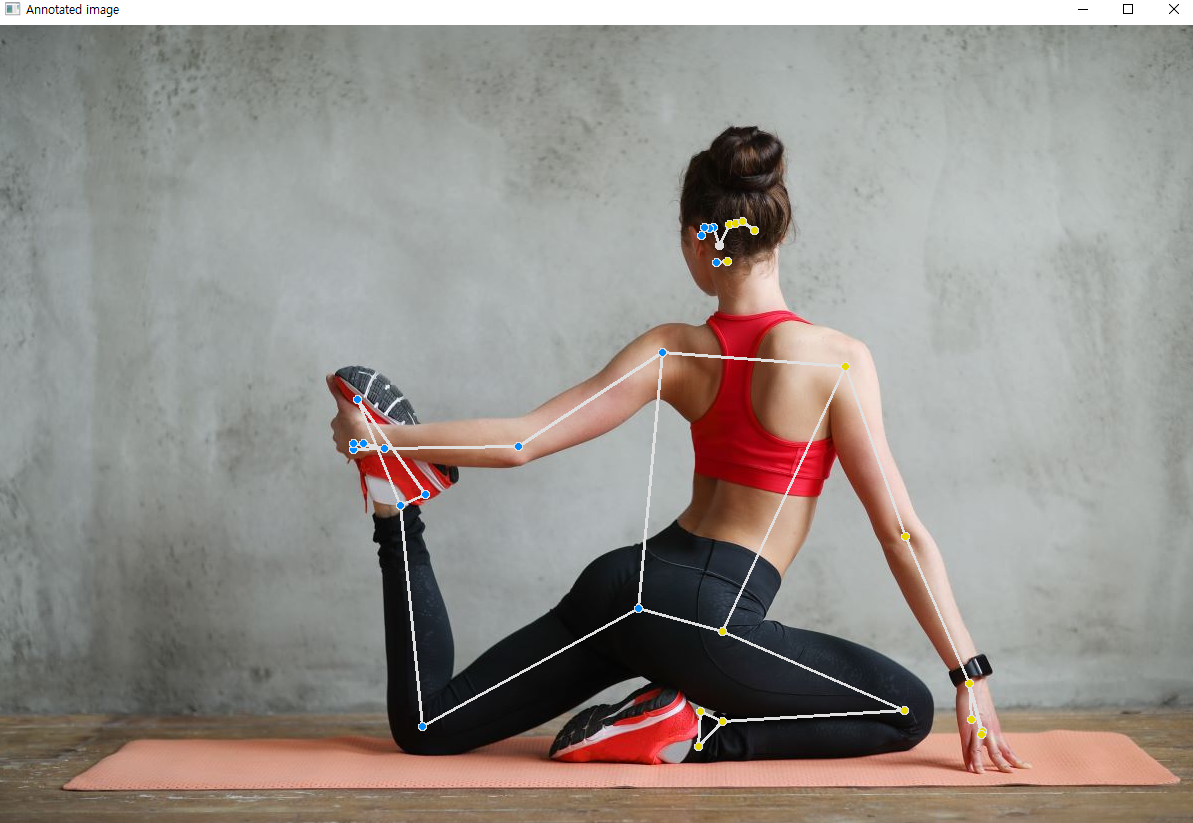
◼ 추론 실행 및 결과 시각화
|
# STEP 1: Import the necessary modules.
import mediapipe as mp
from mediapipe.tasks import python
from mediapipe.tasks.python import vision
# STEP 2: Create an PoseLandmarker object.
base_options = python.BaseOptions(model_asset_path='pose_landmarker.task')
options = vision.PoseLandmarkerOptions(
base_options=base_options,
output_segmentation_masks=True)
detector = vision.PoseLandmarker.create_from_options(options)
# STEP 3: Load the input image.
image = mp.Image.create_from_file("image2.jpg")
# STEP 4: Detect pose landmarks from the input image.
detection_result = detector.detect(image)
# STEP 5: Process the detection result. In this case, visualize it.
annotated_image = draw_landmarks_on_image(image.numpy_view(), detection_result)
cv2.imshow('Annotated image', cv2.cvtColor(annotated_image, cv2.COLOR_RGB2BGR))
cv2.waitKey(0)
cv2.destroyAllWindows()
|
 |
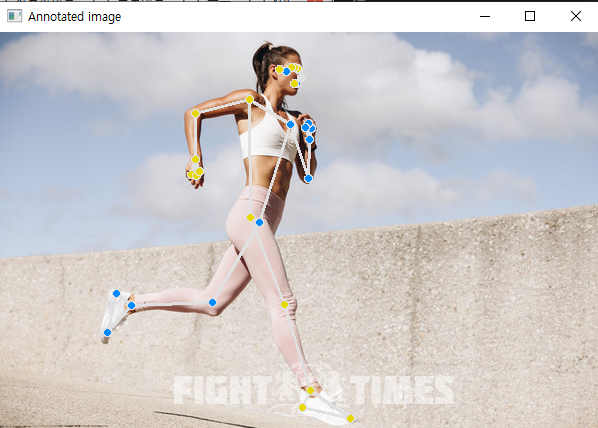
◼ 다양한 사진 넣어보기
|
# STEP 3: Load the input image.
image = mp.Image.create_from_file("image.png") --> 이 부분 변경
|
   |
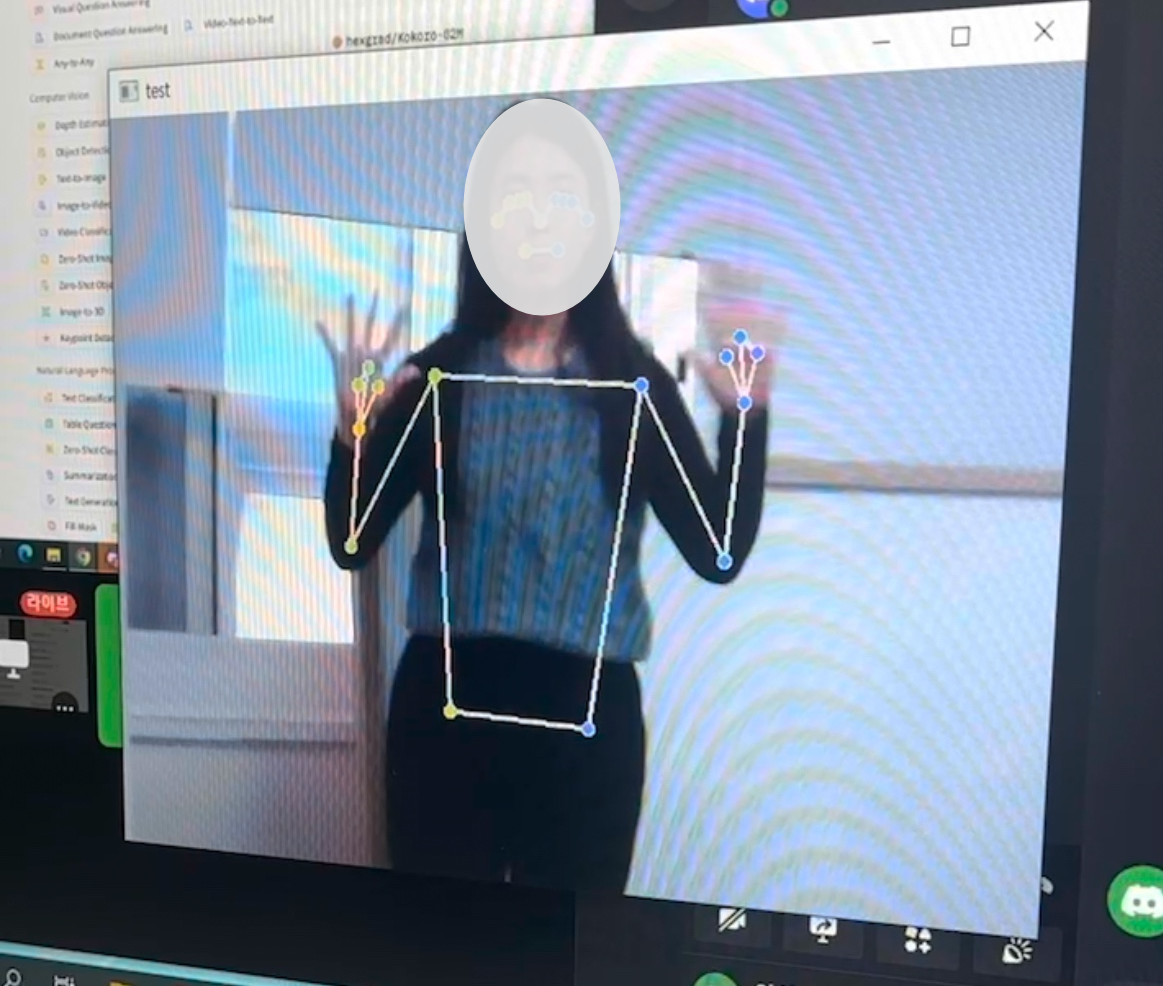
◼ 웹캡으로 인식해보기
|
import mediapipe as mp
from mediapipe import solutions
from mediapipe.framework.formats import landmark_pb2
import numpy as np
from mediapipe.tasks import python
from mediapipe.tasks.python import vision
import cv2
def draw_landmarks_on_image(rgb_image, detection_result):
pose_landmarks_list = detection_result.pose_landmarks
annotated_image = np.copy(rgb_image)
# Loop through the detected poses to visualize.
for idx in range(len(pose_landmarks_list)):
pose_landmarks = pose_landmarks_list[idx]
# Draw the pose landmarks.
pose_landmarks_proto = landmark_pb2.NormalizedLandmarkList()
pose_landmarks_proto.landmark.extend([
landmark_pb2.NormalizedLandmark(x=landmark.x, y=landmark.y, z=landmark.z) for landmark in pose_landmarks
])
solutions.drawing_utils.draw_landmarks(
annotated_image,
pose_landmarks_proto,
solutions.pose.POSE_CONNECTIONS,
solutions.drawing_styles.get_default_pose_landmarks_style())
return annotated_image
## 캠 연결
cap = cv2.VideoCapture(0)
if not cap.isOpened():
print("웹캠을 열 수 없습니다.")
exit()
while True:
# 프레임 읽기
ret, frame = cap.read()
if not ret:
print("프레임을 가져올 수 없습니다.")
break
# STEP 2: Create an PoseLandmarker object.
base_options = python.BaseOptions(model_asset_path='pose_landmarker.task')
options = vision.PoseLandmarkerOptions(
base_options=base_options,
output_segmentation_masks=True)
detector = vision.PoseLandmarker.create_from_options(options)
# STEP 3: Load the input image.
frame_rgb = cv2.cvtColor(frame, cv2.COLOR_BGR2RGB)
mp_image = mp.Image(image_format=mp.ImageFormat.SRGB, data=frame_rgb)
# STEP 4: Detect pose landmarks from the input image.
detection_result = detector.detect(mp_image)
# STEP 5: Process the detection result. In this case, visualize it.
annotated_image = draw_landmarks_on_image(mp_image.numpy_view(), detection_result)
cv2.imshow('test',cv2.cvtColor(annotated_image, cv2.COLOR_RGB2BGR))
if cv2.waitKey(1) & 0xFF == ord('q'):
break
|
   |
'AI > 컴퓨터 비전' 카테고리의 다른 글
| 21. insightface 활용 | 얼굴 유사도 / 얼굴 바꾸기 (0) | 2025.01.03 |
|---|---|
| 19. Mediapipe 활용(1) | 손 랜드마크 감지 (0) | 2025.01.03 |
| 18. YOLO v8을 이용한 차량 파손 검사 (0) | 2024.08.13 |
| 17. YOLO v8을 이용한 이상행동 탐지 (0) | 2024.08.12 |
| 16. YOLO v8를 활용한 안전모 탐지 (0) | 2024.08.08 |


