1. Image Segmentation
* 컴퓨터 비전 분야에서 이미지나 비디오의 디지털 데이터를 여러 개의 부분 또는 객체로 분할하는 기술
* 이미지의 중요한 요소들을 식별하고 각 요소를 개별적으로 분석할 수 있게 하는 것
1. Image Segmentation의 유형 |
|
- 데이터 정보

- 폴더생성
   |
◼ import
|
import os
import random
import shutil
import cv2
import glob
import json
import numpy as np
import matplotlib.pyplot as plt
from tqdm import tqdm
|
◼ 파일 경로 설정
|
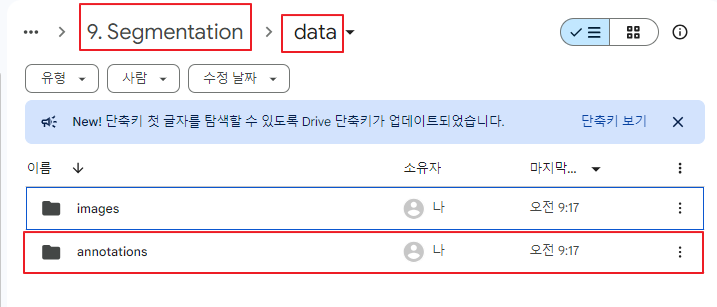
data_root = '/content/drive/MyDrive/1. KDT/8. 컴퓨터 비전/9. Segmentation'
file_root = f'{data_root}/data'
|
 |
◼ 클래스 이름, 프로젝트 이름 설정
|
cls_list = ['Scratched','Breakage','Separated','Crushed']
project_name='cd'
|
 |
◼ 폴더 구조 생성
|
train_root = f'{file_root}/{project_name}/train'
valid_root = f'{file_root}/{project_name}/valid'
test_root = f'{file_root}/{project_name}/test'
for folder in [train_root, valid_root, test_root]:
if not os.path.exists(folder):
os.makedirs(folder)
for s in ['images','labels']:
s_folder = f'{folder}/{s}'
if not os.path.exists(s_folder):
os.makedirs(s_folder)
|
  |
◼ 라벨링 형태 YOLO 형식으로 바꿀 함수 생성
|
# 라벨링 형태 변환(YOLO) : [cls, xc, yx, w, h]
# [[x2,y1],[x2,y2]...]->[cls xc yc w h] : normalize
def json_to_yolo_polygon(polygon, w, h):
yolo_list = []
for p in polygon:
yolo_list.append(p[0]/w)
yolo_list.append(p[1]/h)
return " ".join([str(x) for x in yolo_list])
|
 |
◼ annotations에 json 파일 1,200개가 들어간 것을 확인
|
file_list = glob.glob(f'{file_root}/annotations/*.json')
random.seed(2024)
random.shuffle(file_list)
print(len(file_list))
|
| 1200 |
◼ 첫번째 파일 확인
|
file_list[0]
|
| /content/drive/MyDrive/1. KDT/8. 컴퓨터 비전/9. Segmentation/data/annotations/0004696_as-3293974.json |
◼ JSON 파일에서 라벨링 데이터를 읽어 YOLO 포맷의 텍스트 파일로 변환
|
# 라벨링 형태 변환 파일 생성(json -> txt) 테스트
mask_name = file_list[0].split('/')[-1].replace('json', 'txt')
result = []
with open(file_list[0], 'r') as json_file:
data = json.load(json_file)
h = data['images']['height']
w = data['images']['width']
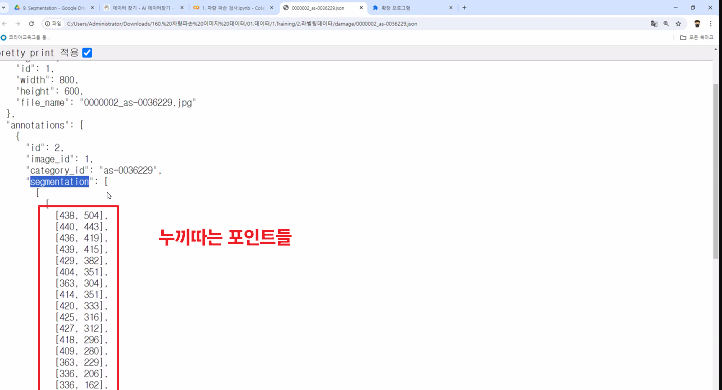
for ann in data['annotations']:
label = ann['damage']
if label in cls_list:
polygon_coord = ann['segmentation'][0][0][:-1]
cood_string = json_to_yolo_polygon(polygon_coord, w, h)
yolo_string = f'{cls_list.index(label)} {cood_string}'
result.append(yolo_string)
|
|
- 주석
더보기
|
# 첫 번째 JSON 파일의 이름에서 확장자를 '.txt'로 변경한 후, 해당 이름을 mask_name 변수에 저장
mask_name = file_list[0].split('/')[-1].replace('json', 'txt')
# YOLO 포맷으로 변환된 라벨 데이터를 저장할 빈 리스트 초기화
result = []
# 첫 번째 JSON 파일을 읽기 모드로 염
with open(file_list[0], 'r') as json_file:
# JSON 데이터를 파싱하여 data 변수에 저장
data = json.load(json_file)
# 이미지의 높이와 너비를 JSON 데이터에서 추출하여 각각 h와 w 변수에 저장
h = data['images']['height']
w = data['images']['width']
# JSON 데이터의 'annotations' 리스트를 반복하여 각 주석(annotation) 처리
for ann in data['annotations']:
# 각 주석에서 손상(damage) 정보를 추출하여 label 변수에 저장
label = ann['damage']
# 만약 label이 클래스 목록(cls_list)에 있는 경우에만 다음 코드를 실행
if label in cls_list:
# 주석에서 다각형 좌표(segmentation)를 추출하고, 마지막 값을 제외한 나머지 좌표를 polygon_cood에 저장
polygon_cood = ann['segmentation'][0][0][:-1]
# 다각형 좌표를 YOLO 포맷의 문자열로 변환
cood_string = json_to_yolo_polygon(polygon_cood, w, h)
# 클래스 인덱스와 변환된 좌표 문자열을 결합하여 YOLO 포맷의 문자열 생성
yolo_string = f'{cls_list.index(label)} {cood_string}'
# YOLO 포맷의 문자열을 result 리스트에 추가
result.append(yolo_string)
|
◼ txt 파일 확인
|
result
|
 |
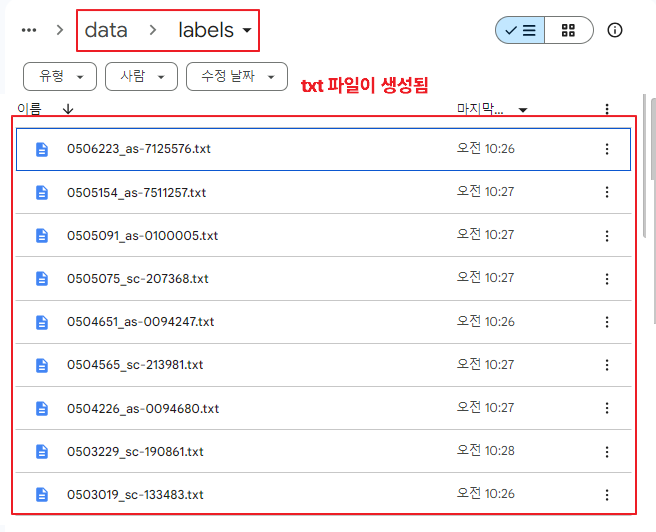
◼ 라벨링 형태 변환 파일 생성(json -> txt)
|
# 라벨링 형태 변환 파일 생성(json -> txt)
if not os.path.isdir(f'{file_root}/labels'):
os.mkdir(f'{file_root}/labels')
for file in tqdm(file_list):
result = []
with open(file, 'r') as json_file:
data = json.load(json_file)
h = data['images']['height']
w = data['images']['width']
for ann in data['annotations']:
label = ann['damage']
if label in cls_list:
polygon_cood = ann['segmentation'][0][0][:-1]
cood_string = json_to_yolo_polygon(polygon_cood, w, h)
yolo_string = f'{cls_list.index(label)} {cood_string}'
result.append(yolo_string)
if result:
save_path = file.replace('annotations', 'labels').replace('json', 'txt')
with open(save_path, 'w', encoding='utf-8') as f:
f.write('\n'.join(result))
|
  |
◼ 훈련(train), 검증(validation), 테스트(test) 세트로 나누고, 각 파일을 해당하는 폴더로 복사하기
|
file_list = glob.glob(f'{file_root}/labels/*.txt')
random.shuffle(file_list)
test_ratio = 0.1
num_file = len(file_list)
test_list = file_list[:int(num_file*test_ratio)]
valid_list = file_list[int(num_file*test_ratio):int(num_file*test_ratio)*2]
train_list = file_list[int(num_file*test_ratio)*2:]
for i in test_list:
label_name = i.split('/')[-1]
shutil.copyfile(i, f'{test_root}/labels/{label_name}')
img_name = i.split('/')[-1].replace('txt', 'jpg')
img_path = f'{file_root}/images/{img_name}'
shutil.copyfile(img_path, f'{test_root}/images/{img_name}')
for i in valid_list:
label_name = i.split('/')[-1]
shutil.copyfile(i, f'{valid_root}/labels/{label_name}')
img_name = i.split('/')[-1].replace('txt', 'jpg')
img_path = f'{file_root}/images/{img_name}'
shutil.copyfile(img_path, f'{valid_root}/images/{img_name}')
for i in train_list:
label_name = i.split('/')[-1]
shutil.copyfile(i, f'{train_root}/labels/{label_name}')
img_name = i.split('/')[-1].replace('txt', 'jpg')
img_path = f'{file_root}/images/{img_name}'
shutil.copyfile(img_path, f'{train_root}/images/{img_name}')
|
1. 파일 목록 가져오기 및 섞기
2. 데이터셋을 테스트, 검증, 훈련 세트로 나누기
3. 파일을 테스트 세트 디렉토리로 복사
4. 파일을 검증 세트 디렉토리로 복사
5. 파일을 훈련 세트 디렉토리로 복사
|
- 주석
더보기
|
# 라벨 파일들의 목록을 가져오고 무작위로 섞음
file_list = glob.glob(f'{file_root}/labels/*.txt')
random.shuffle(file_list)
# 테스트 세트의 비율을 10%로 설정
test_ratio = 0.1
# 전체 라벨 파일의 개수를 계산
num_file = len(file_list)
# 파일 리스트의 처음 10%를 테스트 세트로 할당
test_list = file_list[:int(num_file * test_ratio)]
# 다음 10%를 검증 세트로 할당
valid_list = file_list[int(num_file * test_ratio):int(num_file * test_ratio) * 2]
# 나머지 80%를 훈련 세트로 할당
train_list = file_list[int(num_file * test_ratio) * 2:]
# 테스트 세트의 라벨 파일과 이미지 파일을 복사
for i in test_list:
# 파일 경로에서 파일명만 추출
label_name = i.split('/')[-1]
# 라벨 파일을 테스트 세트의 labels 폴더로 복사
shutil.copyfile(i, f'{test_root}/labels/{label_name}')
# 라벨 파일명에서 확장자를 'txt'에서 'jpg'로 변경하여 이미지 파일명 생성
img_name = i.split('/')[-1].replace('txt', 'jpg')
# 이미지 파일의 경로를 생성
img_path = f'{file_root}/images/{img_name}'
# 해당 이미지를 테스트 세트의 images 폴더로 복사
shutil.copyfile(img_path, f'{test_root}/images/{img_name}')
# 검증 세트의 라벨 파일과 이미지 파일을 복사
for i in valid_list:
# 파일 경로에서 파일명만 추출
label_name = i.split('/')[-1]
# 라벨 파일을 검증 세트의 labels 폴더로 복사
shutil.copyfile(i, f'{valid_root}/labels/{label_name}')
# 라벨 파일명에서 확장자를 'txt'에서 'jpg'로 변경하여 이미지 파일명 생성
img_name = i.split('/')[-1].replace('txt', 'jpg')
# 이미지 파일의 경로를 생성
img_path = f'{file_root}/images/{img_name}'
# 해당 이미지를 검증 세트의 images 폴더로 복사
shutil.copyfile(img_path, f'{valid_root}/images/{img_name}')
# 훈련 세트의 라벨 파일과 이미지 파일을 복사
for i in train_list:
# 파일 경로에서 파일명만 추출
label_name = i.split('/')[-1]
# 라벨 파일을 훈련 세트의 labels 폴더로 복사
shutil.copyfile(i, f'{train_root}/labels/{label_name}')
# 라벨 파일명에서 확장자를 'txt'에서 'jpg'로 변경하여 이미지 파일명 생성
img_name = i.split('/')[-1].replace('txt', 'jpg')
# 이미지 파일의 경로를 생성
img_path = f'{file_root}/images/{img_name}'
# 해당 이미지를 훈련 세트의 images 폴더로 복사
shutil.copyfile(img_path, f'{train_root}/images/{img_name}')
|
◼ 프로젝트 루트 설정
|
project_root = '/content/drive/MyDrive/1. KDT/8. 컴퓨터 비전/9. Segmentation'
|
◼ Google Colab 환경에서 현재 작업 디렉토리를 Segmentation 폴더로 변경
|
%cd /content/drive/MyDrive/1. KDT/8. 컴퓨터 비전/9. Segmentation
|
| /content/drive/MyDrive/1. KDT/8. 컴퓨터 비전/9. Segmentation |
◼ ultralytics 설치하기
|
!pip install ultralytics
|
◼ YOLOv8 모델 사용을 위해 import
|
import yaml
import ultralytics
from ultralytics import YOLO
|
◼ 버전확인
|
ultralytics.checks()
|
◼ Python에서 데이터를 YAML 형식으로 저장하기
|
data = dict()
data['train'] = train_root
data['val'] = valid_root
data['test'] = test_root
data['nc'] = len(cls_list)
data['names'] = cls_list
with open(f'{project_root}/car_damage.yaml', 'w') as f:
yaml.dump(data, f)
|
◼Google Colab 환경에서 현재 작업 디렉토리를 Segmentation 폴더로 변경
|
%cd /content/drive/MyDrive/1. KDT/8. 컴퓨터 비전/9. Segmentation
|
◼ YOLOv8 모델을 사용하여 훈련진행
|
model = YOLO('yolov8s-seg.yaml')
results = model.train(data='car_damage.yaml',epochs=100, batch=16, device=0, patience=30, name='yolo_s')
|
|
◼ YOLO 모델을 불러오기
|
%cd /content/drive/MyDrive/1. KDT/8. 컴퓨터 비전/9. Segmentation
project_root = '/content/drive/MyDrive/1. KDT/8. 컴퓨터 비전/9. Segmentation'
result_folder = f'{project_root}/runs/segment'
model = YOLO(f'{result_folder}/yolo_s/weights/best.pt')
|
◼ 성능 평가
|
metrics = model.val(split='test')
|
 |
◼ 테스트 이미지 파일 불러와서 섞은 후 예측진행
|
%cd /content/drive/MyDrive/1. KDT/8. 컴퓨터 비전/9. Segmentation
test_file_list = glob.glob(f'{test_root}/images/*')
random.shuffle(test_file_list)
test_img = cv2.imread(test_file_list[0])
img_src = cv2.cvtColor(test_img, cv2.COLOR_BGR2RGB)
result = model(img_src)[0]
|
| 0: 640x480 (no detections), 170.9ms Speed: 8.1ms preprocess, 170.9ms inference, 0.9ms postprocess per image at shape (1, 3, 640, 480) |
◼ 폴리곤을 마스크로 변환하는 데 사용되는 라이브러리 import
|
from skimage.draw import polygon2mask
|
◼ YOLO 모델의 예측 결과로부터 얻은 마스크를 활용하여,
이미지에서 특정 영역을 마스킹하고 이를 시각화
|
test_img = cv2.imread(test_file_list[11])
img_src = cv2.cvtColor(test_img, cv2.COLOR_BGR2RGB)
result = model(img_src)[0]
result_mask = np.zeros(test_img.shape[:2])
masks = result.masks
for m in masks:
polygon_coord = m.xy[0]
# 주어진 이미지 크기와 폴리곤 좌표를 사용하여 해당 영역을 1로 채운 마스크를 생성
# 나머지는 0으로 유지
mask = polygon2mask(test_img.shape[:2], polygon_coord)
# maximum(): 두 배열의 요소별 최대값을 반환하므로 여러 객체의 마스크가 겹치더라도 최대값을 유지
result_mask = np.maximum(mask, result_mask)
# 2D 마스크를 3D 배열로 변환하고 repeat() 사용해 동일한 값을 3개의 채널에 복사
result_mask = np.repeat(result_mask[:, :, np.newaxis], 3, -1)
plt.subplot(1, 2, 1)
plt.imshow(img_src)
plt.subplot(1, 2, 2)
plt.imshow(result_mask)
plt.show()
|
 |
◼ 1번째 이미지 시각화
|
project_root = '/content/drive/MyDrive/1. KDT/8. 컴퓨터 비전/9. Segmentation'
result_folder = f'{project_root}/runs/segment'
test_img = cv2.imread(test_file_list[0])
img_src = cv2.cvtColor(test_img, cv2.COLOR_BGR2RGB)
result = model(test_img)[0]
result_mask = np.zeros(test_img.shape[:2])
masks = result.masks
for m in masks:
polygon_coord = m.xy[0]
# 주어진 이미지 크기와 폴리곤 좌표를 사용하여 해당 영역을 1로 채운 마스크를 생성
# 나머지는 0으로 유지
polygon_coord = np.array([[p[1], p[0]] for p in polygon_coord])
mask = polygon2mask(test_img.shape[:2], polygon_coord)
# maximum(): 두 배열의 요소별 최대값을 반환하므로 여러 객체의 마스크가 겹치더라도 최대값을 유지
result_mask = np.maximum(mask, result_mask)
# 2D 마스크를 3D 배열로 변환하고 repeat() 사용해 동일한 값을 3개의 채널에 복사
result_mask = np.repeat(result_mask[:, :, np.newaxis], 3, -1)
plt.subplot(1, 2, 1)
plt.imshow(img_src)
plt.subplot(1, 2, 2)
plt.imshow(result_mask)
plt.show()
|
 |
◼ 14번째 이미지 시각화
|
%cd /content/drive/MyDrive/KDT 시즌3/8. 컴퓨터 비전/9. Segmentation
project_root = '/content/drive/MyDrive/1. KDT/8. 컴퓨터 비전/9. Segmentation'
result_folder = f'{project_root}/runs/segment'
test_img = cv2.imread(test_file_list[13])
img_src = cv2.cvtColor(test_img, cv2.COLOR_BGR2RGB)
result = model(test_img)[0]
result_mask = np.zeros(test_img.shape[:2])
masks = result.masks
for m in masks:
polygon_coord = m.xy[0]
# 주어진 이미지 크기와 폴리곤 좌표를 사용하여 해당 영역을 1로 채운 마스크를 생성
# 나머지는 0으로 유지
polygon_coord = np.array([[p[1], p[0]] for p in polygon_coord])
mask = polygon2mask(test_img.shape[:2], polygon_coord)
# maximum(): 두 배열의 요소별 최대값을 반환하므로 여러 객체의 마스크가 겹치더라도 최대값을 유지
result_mask = np.maximum(mask, result_mask)
# 2D 마스크를 3D 배열로 변환하고 repeat() 사용해 동일한 값을 3개의 채널에 복사
result_mask = np.repeat(result_mask[:, :, np.newaxis], 3, -1)
plt.subplot(1, 2, 1)
plt.imshow(img_src)
plt.subplot(1, 2, 2)
plt.imshow(result_mask)
plt.show()
|
 |
◼ 폴리곤을 정의하는 좌표 목록 확인
|
polygon_coord
|
 |
 |
'AI > 컴퓨터 비전' 카테고리의 다른 글
| 20. Mediapipe 활용(2) | 자세 랜드마크 감지 (0) | 2025.01.03 |
|---|---|
| 19. Mediapipe 활용(1) | 손 랜드마크 감지 (0) | 2025.01.03 |
| 17. YOLO v8을 이용한 이상행동 탐지 (0) | 2024.08.12 |
| 16. YOLO v8를 활용한 안전모 탐지 (0) | 2024.08.08 |
| 15. YOLO v8을 이용한 폐질환 분류 (0) | 2024.08.07 |


