1. OpenCV 모듈
(Open Source Computer Vision Library)
- 컴퓨터 비전과 이미지 처리를 위한 오픈소스 라이브러리
- 1999년 Intel에서 영상처리 기술을 개발하기 위한 목적
- 2000년 BSD 라이센스 배포
- 2011년 이후 OpenCV2로 개발 시작
- 파이참 프로젝트 만들기
◼ opencv 모듈설치 , import
|
pip install opencv-python |
  |
 |
2. 이미지 출력하기
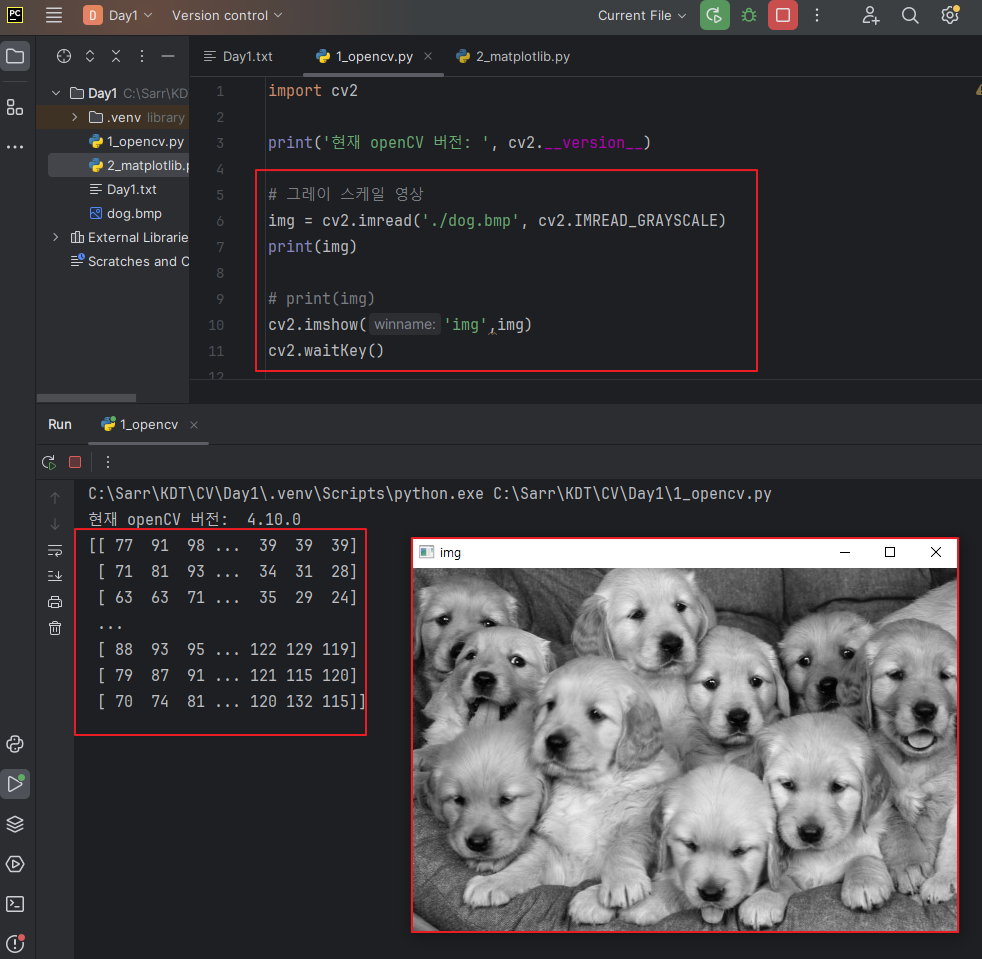
⏺ 전체코드
|
import cv2
# 그레이 스케일 영상
img = cv2.imread('./dog.bmp', cv2.IMREAD_GRAYSCALE)
print(img)
# print(img)
cv2.imshow('img',img)
cv2.waitKey()
# 트루컬러 영상
img = cv2.imread('./dog.bmp', cv2.IMREAD_COLOR)
print(img)
cv2.imshow('img',img)
cv2.waitKey()
|
◼ 그레이스케일 불러오기
|
# 그레이 스케일 영상
img = cv2.imread('./dog.bmp', cv2.IMREAD_GRAYSCALE)
print(img)
# print(img)
cv2.imshow('img',img)
cv2.waitKey()
|
 |
◼ 트루컬러 영상 불러오기
|
# 트루컬러 영상
img = cv2.imread('./dog.bmp', cv2.IMREAD_COLOR)
print(img)
cv2.imshow('img',img)
cv2.waitKey()
|
 |
⏺ 전체코드
|
import cv2
import matplotlib.pyplot as plt
# cv2를 통해 그레이스케일로 출력
img = cv2.imread('./dog.bmp', cv2.IMREAD_GRAYSCALE)
cv2.imshow('img',img)
cv2.waitKey()
# matplotlib을 통해 그레이스케일로 출력
img = cv2.imread('./dog.bmp', cv2.IMREAD_COLOR)
plt.axis('off')
plt.imshow(img, cmap='gray')
plt.show()
# matplotlib을 통해 트루컬러로 출력 / matplotlib: RGB, opencv: BGR
img = cv2.imread('./dog.bmp') #BGR
img = cv2.cvtColor(img, cv2.COLOR_BGR2RGB) #BGR -> RGB
plt.axis('off')
plt.imshow(img)
plt.show()
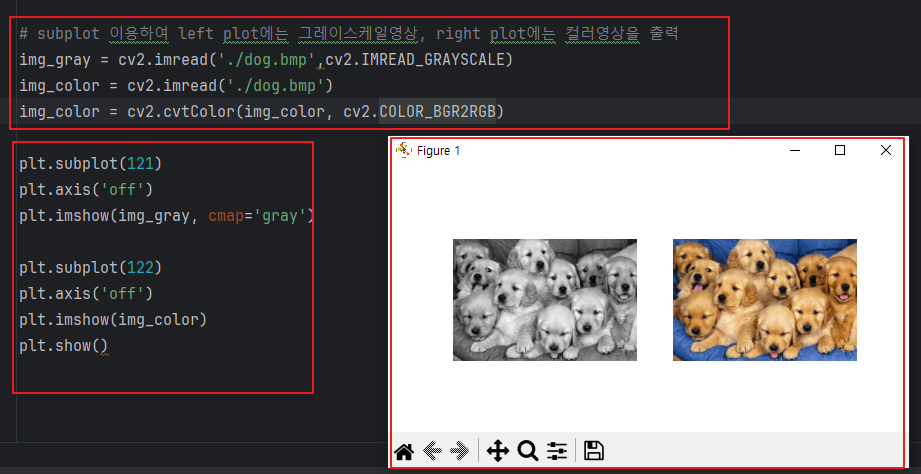
# subplot 이용하여 left plot에는 그레이스케일영상, right plot에는 컬러영상을 출력
img_gray = cv2.imread('./dog.bmp',cv2.IMREAD_GRAYSCALE)
img_color = cv2.imread('./dog.bmp')
img_color = cv2.cvtColor(img_color, cv2.COLOR_BGR2RGB)
plt.subplot(121)
plt.axis('off')
plt.imshow(img_gray, cmap='gray')
plt.subplot(122)
plt.axis('off')
plt.imshow(img_color)
plt.show()
|
◼ cv2를 통해 그레이스케일로 출력
|
import cv2
# cv2를 통해 그레이스케일로 출력
img = cv2.imread('./dog.bmp', cv2.IMREAD_GRAYSCALE)
cv2.imshow('img',img)
cv2.waitKey()
|
 |
◼ matplotlib을 통해 그레이스케일로 출력
|
import cv2
import matplotlib.pyplot as plt
# matplotlib을 통해 그레이스케일로 출력
img = cv2.imread('./dog.bmp', cv2.IMREAD_COLOR)
plt.axis('off')
plt.imshow(img, cmap='gray')
plt.show()
|
 |
◼ matplotlib을 통해 트루컬러로 출력
|
# matplotlib을 통해 트루컬러로 출력 / matplotlib: RGB, opencv: BGR
img = cv2.imread('./dog.bmp') #BGR
img = cv2.cvtColor(img, cv2.COLOR_BGR2RGB) #BGR -> RGB
plt.axis('off')
plt.imshow(img)
plt.show()
|
  |
◼ subplot 이용하여 left plot에는 그레이스케일영상, right plot에는 컬러영상을 출력
|
img_gray = cv2.imread('./dog.bmp',cv2.IMREAD_GRAYSCALE)
img_color = cv2.imread('./dog.bmp')
img_color = cv2.cvtColor(img_color, cv2.COLOR_BGR2RGB)
plt.subplot(121)
plt.axis('off')
plt.imshow(img_gray, cmap='gray')
plt.subplot(122)
plt.axis('off')
plt.imshow(img_color)
plt.show()
|
 |
⏺ 전체코드
|
import cv2
img_gray = cv2.imread('./dog.bmp', cv2.IMREAD_GRAYSCALE)
print('img_gray type:', type(img_gray))
print('img_gray shape:', img_gray.shape) # (세로, 가로)
print('img_gray dtype:', img_gray.dtype)
img_color = cv2.imread('./dog.bmp')
print('img_color type:', type(img_color))
print('img_color shape:', img_color.shape) # (세로, 가로, 채널)
print('img_color dtype:', img_color.dtype)
h, w = img_color.shape[:2]
print(f'이미지 사이즈: {w}*{h}')
# 그레이스케일 영상인지, 컬러영상인지 구분하기
if len(img_color.shape) == 3:
print('컬러 영상')
elif len(img_color.shape) == 2:
print('그레이스케일 영상')
# img_color에 특정 색 정보로 영상을 출력
# BGR: (255, 102, 255)
for x in range(h):
for y in range(w):
img_color[x, y] = (255, 102, 255)
img_color[::] = (255, 102, 255)
cv2.imshow('img_color', img_color)
cv2.waitKey()
|
◼ 이미지 정보보기
|
import cv2
img_gray = cv2.imread('./dog.bmp', cv2.IMREAD_GRAYSCALE)
print('img_gray type:', type(img_gray))
print('img_gray shape:', img_gray.shape) # (세로, 가로)
print('img_gray dtype:', img_gray.dtype)
img_color = cv2.imread('./dog.bmp')
print('img_color type:', type(img_color))
print('img_color shape:', img_color.shape) # (세로, 가로, 채널)
print('img_color dtype:', img_color.dtype)
|
 |
◼ 이미지 사이즈, 이미지형식 출력
|
h, w = img_color.shape[:2]
print(f'이미지 사이즈: {w}*{h}')
# 그레이스케일 영상인지, 컬러영상인지 구분하기
if len(img_color.shape) == 3:
print('컬러 영상')
elif len(img_color.shape) == 2:
print('그레이스케일 영상')
|
 |
◼ img_color에 특정 색 정보로 영상을 출력 | BGR: (255, 102, 255)
|
# img_color에 특정 색 정보로 영상을 출력
# BGR: (255, 102, 255)
for x in range(h):
for y in range(w):
img_color[x, y] = (255, 102, 255)
cv2.imshow('img_color', img_color)
cv2.waitKey()
|
 |
◼ 이중 for문 사용하지 않고 출력
|
img_color[::] = (255, 102, 255)
cv2.imshow('img_color', img_color)
cv2.waitKey()
|
 |
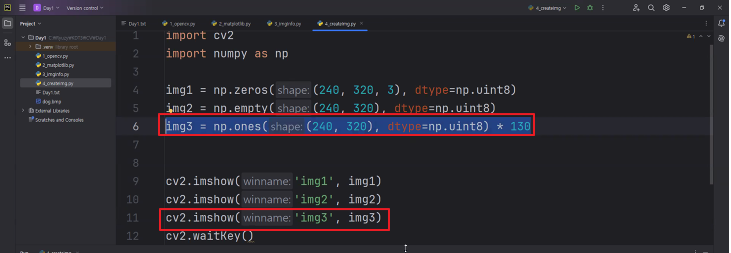
◼ 넘파이로 출력하기
[ img1 ] 240x320 크기의 검은색 이미지
|
import cv2 import numpy as np
img1 = np.zeros((240, 320, 3), dtype = np.uint8)
cv2.imshow('img1', img1)
cv2.waitKey()
|
 |
◼ [ img2 ] 초기화되지 않은 240x320 크기의 단일 채널 이미지를 생성
|
img2 = np.empty((240, 320), dtype = np.uint8)
cv2.imshow('img2', img2)
|
  |
◼ [ img3 ] : 240x320 크기의 모든 픽셀 값이 130인 단일 채널 이미지를 생성
|
img3 = np.ones((240, 320), dtype = np.uint8) * 130
cv2.imshow('img3', img3)
|
  |
◼ [ img4 ]: 240x320 크기의 모든 픽셀 값이 (255, 102, 355)인 3채널 이미지를 생성
|
img4 = np.full((240, 320, 3), (255, 102, 355), dtype = np.uint8)
cv2.imshow('img4', img4)
|
 |
◼ 이미지 복사하기
|
import cv2
img = cv2.imread('./dog.bmp')
img_test = img
img_copy[91:210, 125:245] = (255, 102, 255)
cv2.imshow('img', img)
cv2.imshow('img_test', img_copy)
cv2.waitKey()
|
   |
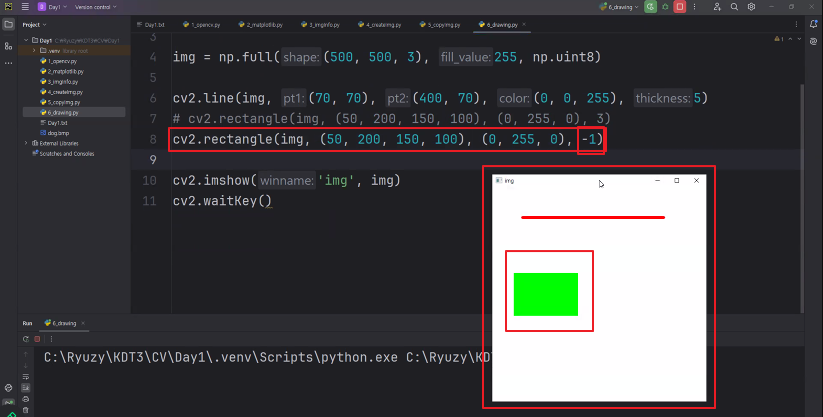
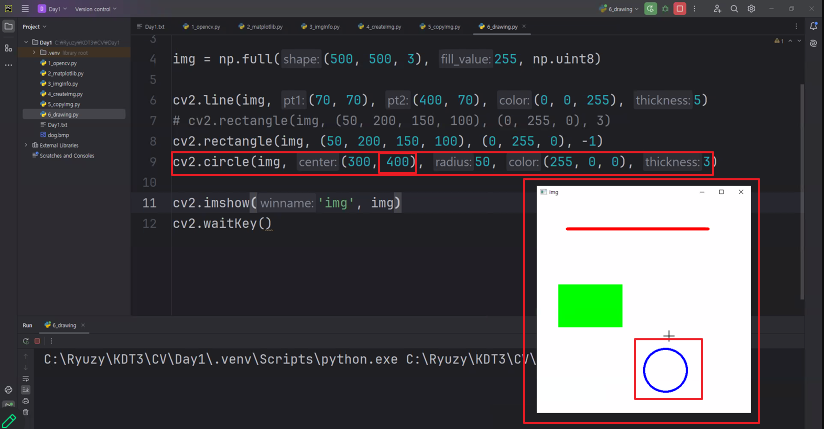
3. 도형그리기
⏺ 전체코드
|
import cv2
import numpy as np
img = np.full((500, 500, 3), 255, np.uint8)
cv2.line(img, (70, 70,), (400, 70), (0, 0, 255), 5)
# cv2.rectangle(img, (50, 200, 150, 100), (0, 255, 0), 3)
cv2.rectangle(img, (50, 200, 150, 100), (0, 255, 0), -1)
# cv2.circle(img, (300, 100), 50, (255, 255, 0), 3)
cv2.circle(img, (300, 400), 50, (255, 255, 0), 3)
cv2.putText(img,'Hello OpenCV', (50, 300), cv2.FONT_HERSHEY_SIMPLEX, 2, (0, 0, 255))
cv2.imshow('img', img)
cv2.waitKey()
|
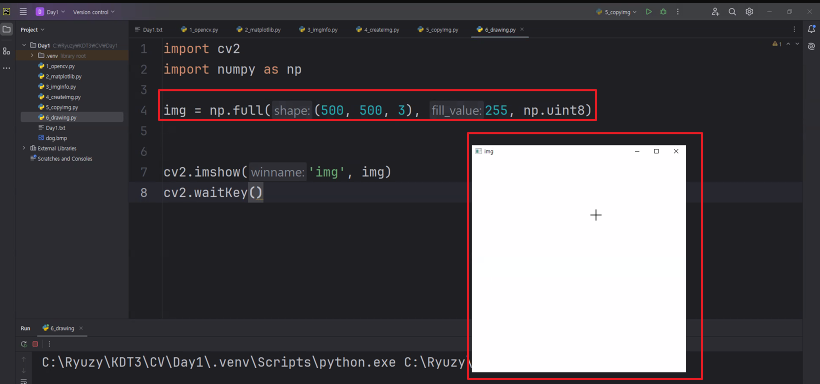
◼ 500x500 크기의 흰색 이미지를 생성
|
import cv2
import numpy as np
img = np.full((500, 500, 3), 255, np.uint8)
cv2.imshow('img', img)
cv2.waitKey()
|
 |
◼ 선 그리기
|
import cv2
import numpy as np
img = np.full((500, 500, 3), 255, np.uint8)
cv2.line(img, (70, 70,), (400, 70), (0, 0, 255), 5)
cv2.imshow('img', img)
cv2.waitKey()
|
 |
◼ 사각형 그리기
|
# cv2.rectangle(img, (50, 200, 150, 100), (0, 255, 0), 3)
cv2.rectangle(img, (50, 200, 150, 100), (0, 255, 0), -1)
|
  |
◼ 원그리기
|
# cv2.circle(img, (300, 100), 50, (255, 255, 0), 3)
cv2.circle(img, (300, 400), 50, (255, 255, 0), 3)
|
  |
◼ 글자 출력하기
|
cv2.putText(img,'Hello OpenCV', (50, 300), cv2.FONT_HERSHEY_SIMPLEX, 2, (0, 0, 255))
|
 |
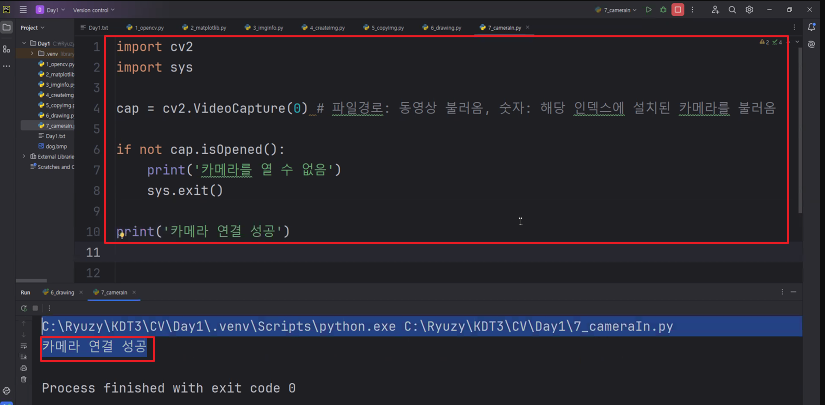
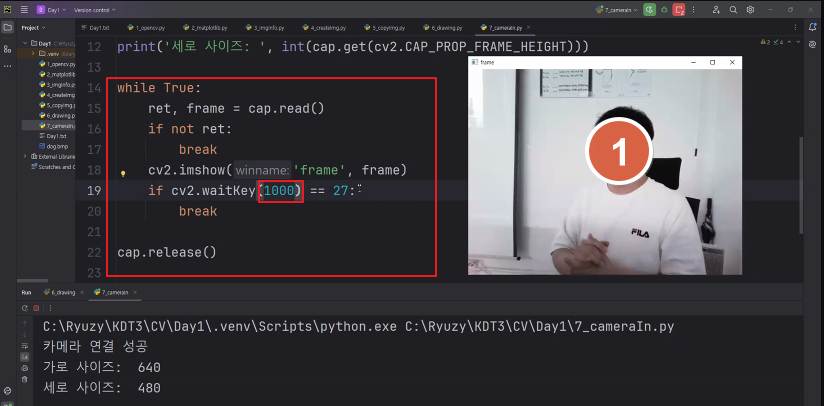
4. 카메라 사용하기
⏺ 전체코드
|
import cv2
import sys
# 파일경로: 해당파일 불러옴 / 숫자: 해당 index에 설치된 카메라를 불러옴
cap = cv2.VideoCapture(0)
if not cap.isOpened():
print('카메라 열 수 없습니다')
sys.exit()
print('카메라 연결 성공')
print('가로 사이즈', int(cap.get(cv2.CAP_PROP_FRAME_WIDTH)))
print('세로 사이즈', int(cap.get(cv2.CAP_PROP_FRAME_HEIGHT)))
while True:
ret, frame = cap.read()
if not ret:
break
cv2.imshow('frame', frame)
if cv2.waitKey(10) == 27:
break
cap.release()
|
◼ 연결 확인
|
import cv2
import sys
# 파일경로: 해당파일 불러옴 / 숫자: 해당 index에 설치된 카메라를 불러옴
cap = cv2.VideoCapture(0)
if not cap.isOpened():
print('카메라 열 수 없습니다')
sys.exit()
print('카메라 연결 성공')
|
  |
◼ 가로, 세로 사이즈 확인
|
print('가로 사이즈', int(cap.get(cv2.CAP_PROP_FRAME_WIDTH)))
print('세로 사이즈', int(cap.get(cv2.CAP_PROP_FRAME_HEIGHT)))
|
 |
◼ 카메라 설정 하기
|
while True:
ret, frame = cap.read()
if not ret:
break
cv2.imshow('frame', frame)
if cv2.waitKey(10) == 27:
break
cap.release()
|
  |
5. 동영상 출력하기
⏺ 전체코드
|
import cv2
import sys
cap = cv2.VideoCapture('./movie.mp4')
if not cap.isOpened():
print('동영상을 불어올 수 없습니다')
sys.exit()
print('동영상 불러오기 성공')
print('가로 사이즈', int(cap.get(cv2.CAP_PROP_FRAME_WIDTH)))
print('세로 사이즈', int(cap.get(cv2.CAP_PROP_FRAME_HEIGHT)))
print('프레임 수', int(cap.get(cv2.CAP_PROP_FRAME_COUNT)))
print('FPS', cap.get(cv2.CAP_PROP_FPS))
while True:
ret, frame = cap.read()
if not ret:
break
cv2.imshow('frame', frame)
if cv2.waitKey(10) == 27:
break
cap.release()
|
◼ 동영상 출력하기
|
import cv2
import sys
cap = cv2.VideoCapture('./movie.mp4')
if not cap.isOpened():
print('동영상을 불어올 수 없습니다')
sys.exit()
print('동영상 불러오기 성공')
print('가로 사이즈', int(cap.get(cv2.CAP_PROP_FRAME_WIDTH)))
print('세로 사이즈', int(cap.get(cv2.CAP_PROP_FRAME_HEIGHT)))
print('프레임 수', int(cap.get(cv2.CAP_PROP_FRAME_COUNT)))
print('FPS', cap.get(cv2.CAP_PROP_FPS))
|
  |
|
while True:
ret, frame = cap.read()
if not ret:
break
cv2.imshow('frame', frame)
if cv2.waitKey(10) == 27:
break
cap.release()
|
 |
💁♀️ 동영상 저장하기 |
|
◼ 동영상 저장하기
|
import cv2
import sys
cap = cv2.VideoCapture('./movie.mp4')
w = round(cap.get(cv2.CAP_PROP_FRAME_WIDTH))
h = round(cap.get(cv2.CAP_PROP_FRAME_HEIGHT))
fps = cap.get(cv2.CAP_PROP_FPS)
fourcc = cv2.VideoWriter.fourcc(*'DIVX')
out = cv2.VideoWriter('mix.avi', fourcc, fps, (w, h))
while True:
ret, frame = cap.read()
if not ret:
break
out.write(frame)
cv2.imshow('frame', frame)
if cv2.waitKey(10) == 27:
break
cap.release()
out.release()
|
   |
◼ 동영상 파일 2개 연결하기
|
import cv2
import sys
cap1 = cv2.VideoCapture('./movie.mp4')
cap2 = cv2.VideoCapture('./movie2.mp4')
w = round(cap1.get(cv2.CAP_PROP_FRAME_WIDTH))
h = round(cap2.get(cv2.CAP_PROP_FRAME_HEIGHT))
frame_cnt1 = round(cap1.get(cv2.CAP_PROP_FRAME_COUNT))
frame_cnt2 = round(cap2.get(cv2.CAP_PROP_FRAME_COUNT))
fps = cap1.get(cv2.CAP_PROP_FPS)
fourcc = cv2.VideoWriter.fourcc(*'DIVX')
out = cv2.VideoWriter('mix.avi', fourcc, fps, (w, h))
for i in range(frame_cp1):
ret, frame = cap1.read()
cv2.imshow('output', frame)
out.write(frame)
if cv2.waitKey(10) == 27:
break
for i in range(frame_cnt1):
ret, frame = cap2.read()
cv2.imshow('output', frame)
out.write(frame)
if cv2.waitKey(10) == 27:
break
cap1.release()
cap2.release()
out.release()
|
  |
6. 키보드 이벤트
| cv2.waitKey(delay) |
|
◼ 해당 키보드 눌렀을 때 변화주기
|
import cv2
# 이미지 읽기
img = cv2.imread('./dog.bmp')
cv2.imshow('img', img)
while True:
keyvalue = cv2.waitKey()
# 'i' 또는 'I' 키를 눌렀을 때 이미지 색상 반전
if keyvalue == ord('i') or keyvalue == ord('I'):
img = ~img
cv2.imshow('img', img)
# ESC 키를 눌렀을 때 프로그램 종료
elif keyvalue == 27:
break
|
  |
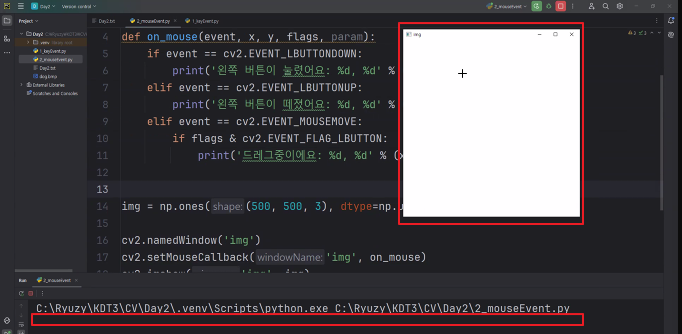
8. 마우스 이벤트
| cv2.setMouseCallback (윈도우이름, 콜백함수, 파라미터) |
|
◼ 콜백함수를 만드는 방법
|
def 함수명(even, x, y, flags, param):
pass
# event: 이벤트 객체
# x, y: 마우스 x, y 좌표
# flags: 마우스 버튼이 눌리고 있는데 떼졌는지 여부
# param : 추가적인 정보가 전달되었다면 저장
|
◼ 마우스 클릭, 오버, 드레그
|
import cv2
import numpy as np
def on_mouse(event, x, y, flags, param):
if event == cv2.EVENT_LBUTTONDOWN:
print('왼쪽 버튼이 눌렸어요: %d, %d' % (x,y))
elif event == cv2.EVENT_LBUTTONUP:
print('왼쪽 버튼이 떼졌어요: %d, %d' % (x,y))
elif event == cv2.EVENT_MOUSEMOVE:
print('드레그중이에요: %d, %d' % (x,y))
img = np.ones((500, 500, 3), dtype = np.uint8) * 255
cv2.namedWindow('img')
cv2.setMouseCallback('img', on_mouse)
cv2.imshow('img', img)
cv2.waitKey()
|
    |
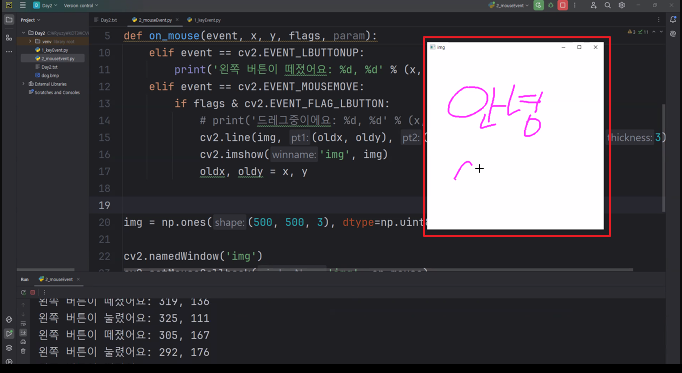
◼ 마우스 드레그로 선그리기
|
import cv2
import numpy as np
def on_mouse(event, x, y, flags, param):
global oldx, oldy
if event == cv2.EVENT_LBUTTONDOWN:
print('왼쪽 버튼이 눌렸어요: %d, %d' % (x,y))
oldx, oldy = x, y
elif event == cv2.EVENT_LBUTTONUP:
print('왼쪽 버튼이 떼졌어요: %d, %d' % (x,y))
elif event == cv2.EVENT_MOUSEMOVE:
if flags & cv2.EVENT_FLAG_LBUTTON:
# print('드레그중이에요: %d, %d' % (x,y))
cv2.line(img, (oldx, oldy), (x,y), (255, 51, 255), 3)
cv2.imshow('img',)
img = np.ones((500, 500, 3), dtype = np.uint8) * 255
cv2.namedWindow('img')
cv2.setMouseCallback('img', on_mouse)
cv2.imshow('img', img)
cv2.waitKey()
|
   |
'AI > 컴퓨터 비전' 카테고리의 다른 글
| 06. 이진화 (0) | 2024.07.18 |
|---|---|
| 05. 마스크, 관심영역 (0) | 2024.07.18 |
| 04. 평활화, 색공간, CLAHE, 정규화 (1) | 2024.07.17 |
| 03. 영상 화소처리 (1) | 2024.07.17 |
| 01. 컴퓨터 비전 (3) | 2024.07.16 |


