1. 환경변수 관리
- 로컬에서 개발 또는 서버에 배포할 때 DB 연결, 포트 설정, 시크릿 키 등 안전하게 관리하기 위하 환경변수로 처리
- .env라는 파일에 환경 변수를 설정
- 설치
npm i dotenv
- .env 파일 만들기
< .env >
# DB
DB_HOST=127.0.0.1
DB_PORT=3306
DB_USER=root
DB_PASSWORD=1234
# JWT
JWT_SECRET=abcd1234%^&*
JWT_EXPIRE_SEC=172800
# BCRYPT
BCRYPT_SALT_ROUNDS=10
# SERVER
PORT=8080
- conpig.js 파일 만들기
< config.js >
import dotenv from 'dotenv';
dotenv.config();
function required(key, defaultValue=undefined){
const value = process.env[key] || defaultValue
// process() : 시스템에 접근 관련한 모듈
// process.env() : env 다룰 수 있는 기능이 들어있음
// if문)
// 먼저 전달받은 키가 있는지 확인,
// 먼저 전달받은 키가 있는지 확인,
// or 앞의 값이 True로 판별되면 앞의 값이 대입,
// or 앞의 값이 False로 판별되면 뒤의 값이 대입
if(value == null){
throw new Error(`키 ${key}는 undefined!!`);
}
return value;
}
//외부에서 가져다 쓸 수 있게 작성
export const config = {
jwt: {
secretKey: required('JWT_SECRET'),
expiresInSec: parseInt(required('JWT_EXPIRES_SEC', 172800))
},
bcrypt: {
saltRounds: parseInt(required('BCRYPT_SALT_ROUNDS', 10))
},
host: {
port: parseInt(required('HOST_PORT', 8080))
}
}
- app.js 수정
< app.js >
import express from "express";
import morgan from "morgan";
import tweetsRouter from './router/tweets.js';
import authRouter from './router/auth.js';
import {config }from './config.js'; //추가
const app = express();
app.use(express.json());
app.use(morgan("dev"));
app.use('/tweets', tweetsRouter);
app.use('/auth', authRouter);
app.use((req, res, next) => {
res.sendStatus(404);
});
//app.listen(8080);//삭제
app.listten(config.host.port);//추가
- controllar > auth.js 수정
< controllar > auth.js >
import * as authRepository from '../data/auth.js';
import bcrypt from 'bcrypt';
import jwt from 'jsonwebtoken';
import { config } from '../config.js'; //추가
//삭제
//const secretKey = "abcd1234%^&*" ;
//const jwtExpiresInDays = '2d';
//const bcryptSaltRounds = 10;
// jwt 토근생성 //수정
function createJwtToken(id){
return jwt.sign({id}, config.jwt.secretKey, {expiresIn: config.jwt.expiresInSec});
}
// 회원가입 함수
export async function signup(req, res, next){
const {username, password, name, email, url} = req.body;
const found = await authRepository.findByUsername(username);
if(found){
return res.status(409).json({message:`${username}이 이미 있습니다`});
}
const hashed = await bcrypt.hash(password, config.bcrypt.saltRounds); //수정
const userId = await authRepository.createUser({username, hashed, name, email, url});
const token = createJwtToken(userId);
res.status(201).json({token, username});
}
// 로그인하는 함수
export async function login(req, res, next){
const {username, password} = req.body;
const user = await authRepository.findByUsername(username);
if(!user){
return res.status(401).json({message : '아이디를 찾을 수 없음'})
}
const isValidpassword = await bcrypt.compareSync(password, user.password);
if(!isValidpassword){
return res.status(401).json({message : `비밀번호가 틀렸음`});
}
const token = createJwtToken(user.id);
return res.status(200).json({token, username});
}
//me
export async function me(req, res, next){
const user = await authRepository.findById(req.userId);
if(!user){
return res.status(404).json({message: `일치하는 사용자가 없음`});
}
res.status(200).json({token: req.token, username: user.username});
}
* Git 에 올리기  |
2. 웹소켓(Web Socket)
전이중통신을 지원
실시간 네트워킹이 보장
브라우저에서 지원하는 소켓 통신
- HTTP 통신
- 요청(request, 클라이언트)과 응답(response, 서버)으로 이루어짐
- 클라이언트가 먼저 요청하고 서버가 수동적으로 응답해주는 구조(반이중통신)
- 웹소켓의 동작원리
1. 최초 연결 요청 시 클라이언트에서 HTTP를 통해 웹서버에 요청
=> (핸드 쉐이크, Handshake: Websocket 프로토콜로 전환)
2. 연결이 수립되면 클라이언트와 서버간의 데이터 통신 단계가 시작
=> 양방향 통신(전이중통신), 상대방에게 ping 패킷을 보낼 수 있음,
=> 수신한 측은 pong 패킷을 전송(핑퐁 주고받는 방식을 Heartbeat라고 함)
3. 클라이언트 혹은 서버 양측 누구나 연결을 종료할 수 있음
=> 양방향 통신(전이중통신), 상대방에게 ping 패킷을 보낼 수 있음
- 설치
npm i socket.io
- 사용 방법
- 정적 파일 서빙
예시(server.js, client.html)
1. 채팅박스 만들기
- client.html 파일 생성
< client.html >
<!DOCTYPE html>
<html lang="en">
<head>
<meta charset="UTF-8">
<meta name="viewport" content="width=device-width, initial-scale=1.0">
<title>클라이언트</title>
</head>
<body>
<h2>간단한 채팅</h2>
<form >
<p>닉네임 : <input type="text" id="nickname"> <button type="button" >설정</button></p>
<p><input type="text" id="message"><button type="button">보내기</button></p>
</form>
<div id="chatBox"></div>
</body>
</html>
 |
- server.js 파일 생성
< server.js >
import express from 'express';
import http from 'http';
import { Server } from 'socket.io';
import path from 'path';
import { fileURLToPath } from 'url';
const app = express();
const server = http.createServer(app);
const io = new Server(server);
const __filename = fileURLToPath(import.meta.url);
const __dirname = path.dirname(__filename);
// 정적 파일 서빙
app.use(express.static(__dirname));
server.listen(8080, () => {
console.log('서버가 8080포트에서 실행중!!');
})
| [console창] PS C:\Sarr\KDT\Web\Project\Server> node server.js 서버가 8080포트에서 실행중!! ------------------------------------------------------------------------------------------------------------------------------- 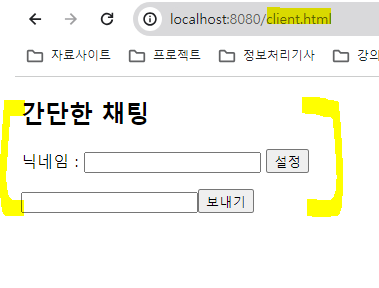 |
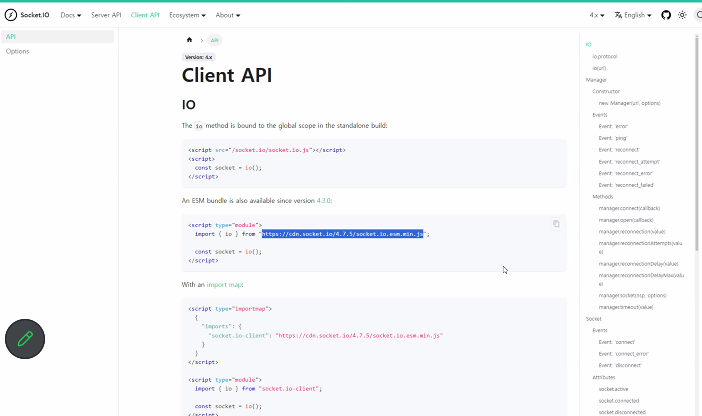
- 소켓 사이트: https://socket.io/
Socket.IO
Reliable Rest assured! In case the WebSocket connection is not possible, it will fall back to HTTP long-polling. And if the connection is lost, the client will automatically try to reconnect.
socket.io
더보기


해킹 방지 코드

붙여넣어주기
2. 접속, 닉네임 설정
- client.html 파일 수정
< client.html >
<!DOCTYPE html>
<html lang="en">
<head>
<meta charset="UTF-8">
<meta name="viewport" content="width=device-width, initial-scale=1.0">
<title>클라이언트</title>
<script src="https://cdn.socket.io/4.7.5/socket.io.min.js" integrity="sha384-2huaZvOR9iDzHqslqwpR87isEmrfxqyWOF7hr7BY6KG0+hVKLoEXMPUJw3ynWuhO" crossorigin="anonymous"></script>
<script>
const socket = io();
function setNickname(){
const nickname = document.getElementById('nickname').value;
socket.emit('setNickname', nickname)
}
</script>
</head>
<body>
<h2>간단한 채팅</h2>
<form >
<p>닉네임 : <input type="text" id="nickname"> <button type="button" onclick="setNickname()">설정</button></p>
<p><input type="text" id="message"><button type="button">보내기</button></p>
</form>
<div id="chatBox"></div>
</body>
</html>
 |
- server.js 파일 수정
< server.js >
import express from 'express';
import http from 'http';
import { Server } from 'socket.io';
import path from 'path';
import { fileURLToPath } from 'url';
const app = express();
const server = http.createServer(app);
const io = new Server(server);
const __filename = fileURLToPath(import.meta.url);
const __dirname = path.dirname(__filename);
// 정적 파일 서빙
app.use(express.static(__dirname));
server.listen(8080, () => {
console.log('서버가 8080포트에서 실행중!!');
})
 |
  |
3. 메세지 콘솔에 찍기
- client.html 파일 추가작성
< client.html >
< scritp >
// 메세지 수신 이벤트 처리
socket.on('setNickname', (message) => {
const chatBox = document.getElementById('chatBox');
const newMessage = document.createElement('p');
newMessage.textContent = message;
chatBox.appendChild(newMessage);
< scritp >
 |
- server.js 파일 추가작성
< server.js >
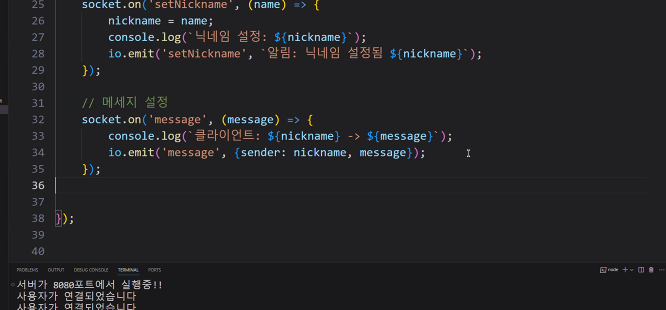
// 메세지 설정
socket.on('mesage',(message))
console.log(`클라이언트: ${nickname} -> ${message}`);
io.emit(`message`,{sender: nickname, message});
});
//소켓종료
socket.on('disconnect', () =>{
console.log(`클라이언트: ${nickname} 접속종료`)
})
  |
  |
4. 메세지 화면에 찍기
- client.html 파일 추가작성
< client.html >
< scritp >
// 메세지 창에 띄우기
socket.on('message',(message) => {
console.log(message);
const chatBox = document.getElementById('chatBox');
const newMessage = document.createElement(`p`);
newMessage.textContent = `${message.sender}: ${message.message}`;
chatBox.appendChild(newMessage);
document.getElementById('message').value='';
})
</ scritp >
 |
 |
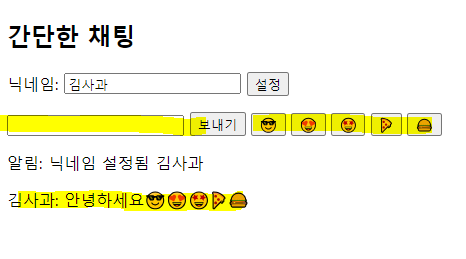
5. 이모지 버튼 누르면 메세지에 입력되게 하기
- client.html 파일 추가작성
< client.html >
< scritp >
// 이모지
function sendMessage(){
const message = document.getElementById('message').value;
socket.emit('message', message);
}
</ scritp >
<body>
<form>
<p>닉네임: <input type="text" id="nickname">
<button type="button" onclick="setNickname()">설정</button></p>
<p><input type="text" id="message">
<button type="button" onclick="sendMessage()">보내기</button>
<button type="button" onclick="addEmoji('😎')">😎</button>
<button type="button" onclick="addEmoji('😍')">😍</button>
<button type="button" onclick="addEmoji('🤩')">🤩</button>
<button type="button" onclick="addEmoji('🤩')">🤩</button>
<button type="button" onclick="addEmoji('🍕')">🍕</button>
<button type="button" onclick="addEmoji('🍔')">🍔</button></p>
</form>
</ body>
 |
6. 채널을 생성하여 채팅을 완성해보자
| 닉네임: [ ] [설정] 채널: [ ] [ 입장 ] 채널리스트 게임 만화 [ ] [보내기] |
| socket.join(값) ; 해당 값에 속한 소켓 객체가 됨 // 채널 설정 socket.join(channel); //메세지 설정 id.emit() : 모든 소켓 객체에게 이벤트르 받생 |
- client.html 파일 추가작성
< client.html >
< scritp >
function setChannel(){
const channel = document.getElementById('channel').value;
socket.emit('setChannel',channel);
}
socket.on('updateChannelList', (channelList)=>{
const channelListElement = document.getElementById('channelList');
channelListElement.innerHTML = '';
channelList.forEach((channel) => {
const channelItem = document.createElement('li');
channelItem.textContent = channel;
channelListElement.appendChild(channelItem);
});
})
</ scritp >
<body>
<p>채널: <input type="text" id="channel"> <button type="button" onclick="setChannel()">입장</button></p>
<p><ul id="channelList"></ul></p>
</ body>
- server.js 추가작성
< server.js >
import express from 'express';
import http from 'http';
import { Server } from 'socket.io';
import path from 'path';
import { fileURLToPath } from 'url';
import { channel } from 'diagnostics_channel';
const app = express();
const server = http.createServer(app);
const io = new Server(server);
const __filename = fileURLToPath(import.meta.url);
const __dirname = path.dirname(__filename);
// 정적 파일 서빙
// localhost:8080/client.html
app.use(express.static(__dirname));
const channels = new Set(); //추가
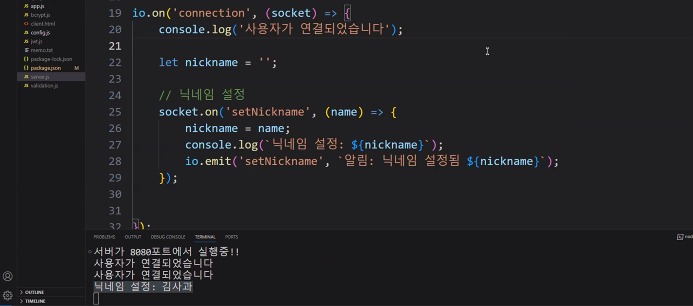
io.on('connection', (socket) => {
console.log('사용자가 연결되었습니다');
let nickname = '';
let channel = ''; //추가
// 닉네임 설정
socket.on('setNickname', (name) => {
nickname = name;
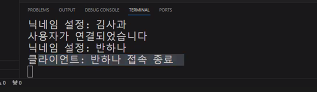
console.log(`닉네임 설정: ${nickname}`);
io.emit('setNickname', `알림: 닉네임 설정됨 ${nickname}`);
});
// 메세지 설정
socket.on('message', (message) => {
console.log(`클라이언트: ${nickname} -> ${message}`)
io.to(channel).emit('message', {sender: nickname, message})
});
//채널 설정 //추가
socket.on('setChannel', (ch) => {
channel = ch;
socket.join(channel);
channels.add(channel);
console.log(`클라이언트: ${nickname}님이 채널 ${channel}에 입장`);
io.emit('updateChannelList', Array.from(channels))
});
// 소켓 종료
socket.on('disconnect', () => {
console.log(`클라이언트: ${nickname} 접속 종료`)
});
});
server.listen(8080, () => {
console.log('서버가 8080포트에서 실행중!!');
})
 |
❗ 전체코드
- client.html
더보기
<!DOCTYPE html>
<html lang="en">
<head>
    <meta charset="UTF-8">
    <meta name="viewport" content="width=device-width, initial-scale=1.0">
    <title>클라이언트</title>
    <script src="https://cdn.socket.io/4.7.5/socket.io.min.js" integrity="sha384-2huaZvOR9iDzHqslqwpR87isEmrfxqyWOF7hr7BY6KG0+hVKLoEXMPUJw3ynWuhO" crossorigin="anonymous"></script>
    <script>
        const socket = io();

        function setNickname(){
            const nickname = document.getElementById('nickname').value;
            socket.emit('setNickname', nickname);
        }

        function sendMessage(){
            const message = document.getElementById('message').value;
            socket.emit('message', message);
        }

        function addEmoji(emoji){
            const message = document.getElementById('message');
            message.value += emoji;
        }

        function setChannel(){
            const channel = document.getElementById('channel').value;
            socket.emit('setChannel', channel);
        }

        // 메세지 수신 이벤트 처리
        socket.on('setNickname', (message) => {
            const chatBox = document.getElementById('chatBox');
            const newMessage = document.createElement('p');
            newMessage.textContent = message;
            chatBox.appendChild(newMessage);
        });

        socket.on('message', (message) => {
            console.log(message);
            const chatBox = document.getElementById('chatBox');
            const newMessage = document.createElement('p');
            newMessage.textContent = `${message.sender}: ${message.message}`;
            chatBox.appendChild(newMessage);
            document.getElementById('message').value = '';
        });

        socket.on('updateChannelList', (channelList) => {
            const channelListElement = document.getElementById('channelList');
            channelListElement.innerHTML = '';
            channelList.forEach((channel) => {
                const channelItem = document.createElement('li');
                channelItem.textContent = channel;
                channelListElement.appendChild(channelItem);
            });
        })
    </script>
</head>
<body>
    <h2>간단한 채팅</h2>
    <form>
        <p>닉네임: <input type="text" id="nickname"> <button type="button" onclick="setNickname()">설정</button></p>
        <p>채널: <input type="text" id="channel"> <button type="button" onclick="setChannel()">입장</button></p>
        <p><ul id="channelList"></ul></p>
        <p><input type="text" id="message"> <button type="button" onclick="sendMessage()">보내기</button> <button type="button" onclick="addEmoji('😎')">😎</button> <button type="button" onclick="addEmoji('🎃')">🎃</button> <button type="button" onclick="addEmoji('😛')">😛</button> <button type="button" onclick="addEmoji('😊')">😊</button> <button type="button" onclick="addEmoji('🤣')">🤣</button></p>
    </form>
    <div id="chatBox"></div>
</body>
</html>
- server.js
더보기
import express from 'express';
import http from 'http';
import { Server } from 'socket.io';
import path from 'path';
import { fileURLToPath } from 'url';
import { channel } from 'diagnostics_channel';

const app = express();
const server = http.createServer(app);
const io = new Server(server);
const __filename = fileURLToPath(import.meta.url);
const __dirname = path.dirname(__filename);


// 정적 파일 서빙
// localhost:8080/client.html
app.use(express.static(__dirname));

const channels = new Set(); //추가

io.on('connection', (socket) => {
    console.log('사용자가 연결되었습니다');

    let nickname = '';
    let channel = ''; //추가

    // 닉네임 설정
    socket.on('setNickname', (name) => {
        nickname = name;
        console.log(`닉네임 설정: ${nickname}`);
        io.emit('setNickname', `알림: 닉네임 설정됨 ${nickname}`);
    });

    // 메세지 설정
    socket.on('message', (message) => {
        console.log(`클라이언트: ${nickname} -> ${message}`)
        io.to(channel).emit('message', {sender: nickname, message})
    });

    //채널 설정 //추가
    socket.on('setChannel', (ch) => {
        channel = ch;
        socket.join(channel);
        channels.add(channel);
        console.log(`클라이언트: ${nickname}님이 채널 ${channel}에 입장`);
        io.emit('updateChannelList', Array.from(channels))
    });

    // 소켓 종료
    socket.on('disconnect', () => {
        console.log(`클라이언트: ${nickname} 접속 종료`)
    });
});

server.listen(8080, () => {
    console.log('서버가 8080포트에서 실행중!!');
})
'Web > Node.js' 카테고리의 다른 글
| 17. Sequelize (0) | 2024.05.08 |
|---|---|
| 16. ORM (0) | 2024.05.03 |
| 14. Postman 정리, 아이디 중복체크 (0) | 2024.05.02 |
| 13. Authentication, bcrypt, JWT (0) | 2024.04.29 |
| 12. Validate(데이터 검증) (0) | 2024.04.29 |


